Try this all-natural spray for your shiniest hair ever!

Most commercial hair-smoothing sprays and serums are packed to the brim with silicone and preservatives. Sure, silicone looks good at first – it shrink-wraps hair in something like plastic, making it look sleek and smooth.


But, unfortunately, silicone builds up with use unless you use really harsh detergents to strip it off your hair. This build-up can lead to flat, heavy, dull locks, which makes dedicated product junkies think the answer lies in more silicone!


Get off the shrink-wrapped hair bandwagon with this completely natural and intensely nourishing shine spray – I just know you’ll love it!

large (3)


Try this silicone-free shine spray on your hair

Ingredients:

  • 1 tbsp water
  • 1 tbsp jojoba oil
  • 1 tbsp vegetable glycerine
  • 2 tsp distilled white vinegar
  • 10 drops vitamin E oils
  • 10 drops lemon essential oil
  • 5 drops orange essential oil
  • 5 drops bergamot essential oil

Method:

  1. In a spray bottle, combine all the ingredients.
  2. Lid the bottle tightly and shake well to combine.
  3. Spray the shine spray onto the tips of your hair to tame frizz and split ends. For all-ovr smoothing, or to protect your locks before styling, spray throughout your hair.

Additional tips:

  • For best results, avoid spray the shine spray onto your roots.
  • Store the shine spray somewhere cool and dry and it’ll stay fresh for up to three months, though the essential oil scent will fade over about a month.

Five tips for getting the life back into your locks

No time to visit the hair salon? Looking for new ways to get the life back into your locks? Here are some easy alternatives to get healthy hair at home!

large (7)


Five tips to care for your hair

#1: Tame unruly frizz with fresh avocado

Ask any beauty expert and they’ll swear by the hair benefits of avocado! The fruit contains essential oils that work wonders on all hair types, but are particularly beneficial for those with unruly frizz. Avocado’s moisturising power will smooth out and tame your locks for a controlled finish.

#2: Control oil levels with corn starch

Too much oil can make your hair look damp. Sprinkle a little corn starch onto your locks to absorb unwanted excess grease, bringing your hair back to a healthy hydration level. Mixed with a pinch of sea salt and brushed out after ten minutes, this home remedy will aid any oil concerns!

#3: Get rid of dull, dehydrated strands with honey

Over-exposure to the sun and constant use of our trusty hair straighteners will leave your hair dull and dehydrated. Adding a bit of nature’s sweetness AKA honey to your hair care routine will help lock in much-needed moisture, giving your strands that hydration lift that lasts! PS: Make sure you use raw honey only.

#4: Plump up tired hair with beer

Bizarre, I know. But, believe it or not, the properties found in beer can take your hair from drab to fab! Plumping up tired hair can prove difficult, but this surprising remedy creates a bull-bodied mane in seconds. Pour the beer into a spray bottle and spritz it onto your dry hair. The remaining residue will strengthen and structure your air more a more voluminous look.

#5: Treat flaky scalp with a squeeze of lemon

If you’re prone to a dry, flaky scalp, look no further than your kitchen cupboard. A mixture of lemon juice and olive oil can solve your problems in no time! The acidity in lemon juice will help your scalp shed all the loose, dry skin, while the olive oil will add the moisture back.

Renew your skin and hair in under twenty minutes with this honey and coconut oil mask

Dry skin and damaged hair. We’ve all been there… Am I right? Products, blow dryers and weather all take it out on your skin and hair. And that’s where my quick and easy honey and coconut oil masks comes in!

This all-natural mask is perfect for repairing and replenishing dry skin and hair. The best part is that it only calls for two simple ingredients: Raw honey and coconut oil! Here’s how to mix it up and apply it.

coconut-honey


Honey and coconut oil skin and hair mask

You’ll need:

  • 1 tbsp raw honey
  • 1 tbsp virgin organic coconut oil
  • Sauce pan
  • Mixing bowl

How to mix up the mask:

  1. Add the honey and coconut oil mixture up on your stovetop in a small sauce pan over a low heat.
  2. Once melted and combined, add the mixture to a mixing bowl and stir well with a spoon.
  3. Leave the mixture to cool down for five minutes.

How to apply the mask:

  1. Use your fingertips to apply the mask to your clean face. It may be a little drippy, so be careful not to apply too much! Put a towel around your neck to protect your clothes if need be.
  2. Dampen your hair, then use your fingertips to apply the mask from top to bottom. It helps to section your hair off to apply the mask thoroughly.
  3. Wrap your hair in a bun, then sit back and relax for 10 to 15 minutes while the mask soaks into your skin and hair.
  4. Splash your face with warm water and shampoo your hair as per usual to  rinse off the mask.

What this honey and coconut oil mask will do for your skin and hair

  • It will brighten your skin
  • It will moisturise your skin
  • It will strengthen your hair
  • It will give your hair a natural shine
  • It will moisturise your hair
  • It will smooth your hair
  • It will nourish your scalp

I had a hair makeover at the trendy new Ginger salon in Parkmore – here’s what I thought

I have something exciting to tell you… Over the weekend, I had a hair makeover. That’s right – a full-on makeover! For all my life, I’ve had light blonde locks that I’ve maintained with a monthly half head of highlighters AKA a root refresher.

Then, in January this year, I decided to step out of my comfort zone for the first time ever and go chocolate brown. My boyfriend and all my friends had been urging me to do it for months and months considering I have bright blue eyes, which they convinced me would stand out even more if I had darker hair.

Anyway, long story short – I regretted making that decision instantly. I hated my chocolate brown hair from the minute I first saw it in the mirror! It took me four visits to the hairdresser and lots of treatments to claim back my signature blonde locks. Once I got back to my desired shade of blonde, I swore I’d never change my hair colour again. Ever!

Then, a couple of weeks ago, I received an invitation to visit the newly-established Ginger hair salon in Parkmore and review their services. Now, for a good couple of months, I’ve been totally obsessed with the grey hair trend. If you live on WeHeartIt and Tumblr like I do, you’ve definitely seen what I’m talking about. No – going grey isn’t a hair nightmare, and yes – lots of A-listers have been spotted sporting gorgeous grey locks! The catwalks are teaming with grey-haired beauties, too.

Anyway, since I received this invite and confirmed my appointment, I pondered the idea of “going grey”. I was totally unsure about it up until the very moment that I sat down in my stylist’s chair. And, yup, you guessed it – I ended up going for silver strands in the end! So what made me do it? And do I love it? I’ll tell you all.

11825150_410761095779099_4099990545937233141_n

So, on Saturday morning, I arrived at Ginger at around 9:30am. The salon is conveniently situated on the busy and buzzing 11th Street in Parkmore. Upon entering the salon, I was greeted by the very lovely, bubbly Jenna – one of the owners. I was also delighted by the beautiful interior – simplistic, all white and just ever-so-chic!

Jenna quickly showed me to my warm and welcoming stylist, Kelly – the other owner of Ginger. Kelly sat me down and offered me freshly-baked red velvet cupcakes and a cappuccino before getting to talking about what I wanted done with my hair. Pretty nervous to say the least, I whipped out my iPhone and began showing Kelly a couple of reference pictures I’d saved of the grey hair trend (like the ones below). Immediately, she got excited, assuring me that she could totally do that for me. And, yes, her enthusiasm is what made me say, okay, let’s do it! I felt confident, and the process began straight away.

large (1)

The grey hair trend – don’t you just love it?

large

I’m obsessed!

First off, my whole head of hair was bleached, which is never a pleasant process (I know all of you platinum blondes out there feel me on this one!), but beauty is pain, as we all know. Now, because bleach is so super-damaging to hair, Kelly made sure that it was mixed with Olaplex – the new hair treatment everyone’s talking about right now that reconnects broken disulphide sulphur bonds in the hair that happen during thermal, mechanical or chemical processes, like bleaching. This was my second experience with Olaplex, so I was really confident that my hair was “safe”. (It’s really a revolutionary treatment!)

After about half an hour, I was taken to the basins to have the bleach rinsed out of my hair. A lovely assistant made sure I was comfortable in one of the plush and comfy leather seats at the basin (yes, they have leather chairs at the basins – and they have foot rests, too!), and began rinsing my hair. She was very gentle, and did a great job at thoroughly rinsing my hair and at that point sensitive scalp. Kelly then came back over and applied the silver grey tint to my bleached blonde hair, which was also mixed with Olaplex to avoid damage. For ten minutes, I sat back and relaxed while my hair absorbed the grey tint.

11921670_416821541839721_1397719681117179437_n

The assistant then rinsed the tint out of my hair, and shampooed my locks twice. She then applied another anti-breakage treatment, followed by a deep conditioning treatment to soothe my hair and scalp, and then gave me the most amazing head massage ever. My goodness, it was so relaxing! I then moved back into Kelly’s hands for a blow dry and she asked me what I’d like done styling-wise. I decided on loose curls.

When Kelly was done drying and styling my hair, I fell in love instantly! I loved my ice-cool blonde mane with the gorgeous silver tint she’d put on! Before I left the salon, Kelly made sure that I was clued up on how to best maintain my grey hair before my next trip to the hairdresser. She also sent me home with a bottle of Olaplex No. 3 Hair Perfector, which is a take-home treatment to use once a week between salon visits to keep your hair in tip top shape. Ever since my hair makeover, I’ve only received compliments and had ladies stop me in shopping centres to ask where I had it done!

12031630_976829219047041_4789311226519676481_o

My new hair coloured and styled by Kelly

Overall, I must say that I had an exceptional experience at Ginger. The stylists were all very attentive, and I left with exactly what I asked to have done (and that’s a rare happening in a hair salon, as I’m sure you know). It’s a gorgeous, upmarket place that uses and stocks only the best brands of products, and their prices are super-reasonable, with a ladies cut starting at R315 and a full head of highlights going for R1000.

I say ditch the overpriced mainstream hair salons and try this intimate little place out. I’m confident that Jenna, Kelly and their team will take brilliant care of your hair and make you feel (and look) like a queen! Another plus? They have a nail technician in house too, so you can get your nails done at the same time as your hair. Also, get your boyfriend to tag along for a cut by Ashley, one of Ginger’s stylists who specialises in male haircuts (I saw him snipping away while I was there and his work was flawless!).

Want to book an appointment? You can do so online here.

DETAILS:

Address: 78 11th Street, Parkmore, Sandton, Johannesburg

Phone number: 011 326 7456

Facebook page: https://www.facebook.com/jennakellysginger

Website: http://www.g4ginger.co.za/index.html 

PS: Wondering what my go-to hair products are? Click here and find out!

Five lesser-known oils that promote healthy skin and hair

Apart from the well-known natural oils like hemp and coconut, there are a number of lesser-known ones that provide equally impressive skin and hair benefits when you use them both internally and externally. Play around with these awesome oils and find the best one for your unique skin type, hair, body and tastes!

macadamia-nut-oil

Five brilliant oils for beautiful skin and hair

#1: Macadamia nut oil

This lovely oil has a nutty, sweet smell and taste. You can use it in the kitchen and even heated since it has a slightly higher smoke point than most other oils. However, my favourite use for macadamia nut oil is as a moisturiser for the tips of my hair. Adding this oil to the tips of your locks both in and out of the shower will help lock in moisture without making your hair greasy like other oils such as coconut oil. You can also use this oil as a body moisturiser, a shaving gel or an aftershave to prevent razor burn and ingrown hairs.

#2: Jojoba oil

Jojoba oil is one of the most amazing natural oils for skin out there. It doesn’t have any internal uses, though; so keep it out of the kitchen. It’s a great option for a skin cleanser and moisturiser since it’s very similar to your skin’s natural oil. It also has impressive antibacterial properties, making it a great option for acne-prone skin types. Jojoba oil is also packed with vitamins including A, B and E, which are all super-nourishing. It can be used as a makeup remover and hair moisturiser as well as a crucial oil and lip conditioner.

#3: Avocado oil

Avocado oil is similar to hemp oil in a sense that it’s wonderful for healing up blemishes, redness and scarring on the skin. It also works very well as a gentle shaving gel and full body and hair moisturiser. In addition, avocado oil is tasty when you use it for low-heat cooking, or even drizzled over a salad.

#4: Sesame oil

This oil is a great option for oil-pulling, especially if you don’t like the taste of coconut oil. Sesame oil is also fantastic for cooking – it’s a nourishing healthy fat that’s particularly high in zinc, making it beneficial for skin externally. So, go ahead and slather some on! Sesame oil is high in vitamin E, and also effective for mild sun protection.

#5: Hazelnut oil

Also very rich in vitamin E, this oil is nourishing for al skin types, and is particularly good for sensitive skin and oily skin. This is because the moisturising properties of hazelnut keep skin from excessive oil production, which causes redness and blemishes. It also has astringent properties and tightens pores, limiting oil secretions.

So there you go! Five of my favourite lesser-known oils and their awesome uses. Enjoy!

Four natural oils that I can’t live without and how to use them

Natural oils don’t get enough credit for all of the remarkable benefits they provide. I mean, how many items can be useful both internally and externally, in the bathroom and in the kitchen, in your smoothies and on your skin? Oils are just magical!


While all natural oils are stars, these five especially blow my mind with their many different uses.

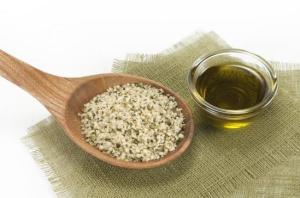
hemp-oil-cured-patient-with-late-stage-cancer-he-actually-coughed-out-cancer-video


Five natural oils you’ve got to try for yourself

#1: Hemp oil

In my opinion, hemp oil is the best oil for your skin, especially if it’s acne-prone. I use it as my face wash every evening. It not only removes make-up, but deep cleans the skin. It’s dark green colour is awesome for combating redness and scarring. Organic hemp seed oil as a cleanser and moisturiser works so well because it doesn’t clog your pores. Hemp oil is 57% linoleic acid and adding linoleic acid to your skin (and to your diet) creates softer and smoother oil glands, so oil doesn’t get clogged.

Hemp oil also works wonders when added to your diet. It’s great in salad dressings (just mix with apple cider vinegar, sea salt, oregano and garlic) or add to your smoothies. The only downside of this oil is that is must be kept in the fridge to stay fresh, making it a bit difficult to travel with, but you can find it in any health food store once you arrive.

#2: Neem oil

This might be the wonder oil. It works like a charm for clearing up acne, scarring, cuts, and even cold scores. If I get a blemish I apply it at night and it is gone or visibly reduced by morning. It’s great to have in the house for healing any skin cuts or scrapes. This oil does have a pungent odour, though – so don’t get it in your mouth, and only use externally!

#3: Castor oil

This oil can be used for everything from constipation relief to labour induction. My favorite use for castor oil is hair growth. Each evening I rub a bit of castor oil on a cotton bud and apply it to my eyelashes. It makes them grow in super-long and thick by moisturising them and generating new hair growth.

I also love to use castor oil to aid with digestion by rubbing it on my stomach a few hours after eating a meal. You can just apply it to your stomach and add a hot water bottle on top to help it absorb. Make sure you’re getting a high quality brand that is hexane free because this oil absorbs so deeply!

#4: Coconut oil

Coconut oil is a rock star both in and out of the kitchen. Coconut oil is the best oil to cook with since it has a high smoke point meaning it won’t go rancid like other oils when heated. It has antibacterial and antifungal properties so taken internally it’s even considered a superfood. It’s awesome added to smoothies or even melted into coffee or tea making it creamy, delicious and more nutritional by bringing healthy fats to your brain.

Externally, coconut oil is excellent for both skin and hair. I use it on a cotton swab nightly to remove eye makeup and also use it as a moisturising hair mask by applying it to my hair at night and washing it out in the morning. Coconut oil is the best oil to use for the Ayurvedic practice of oil-pulling and it’s antibacterial and antifungal properties make it great for that and can even help with candida.

It can also be used as a body moisturiser and is even great to apply before sun exposure as it is approximately SPF 10. It also helps with thyroid function and can be applied externally right onto the thyroid gland, which is said to increase metabolism and energy. This oil is great as the main ingredient in natural DIY deodorant (simply mix it with equal parts arrowroot starch and baking soda). Coconut oil is solid and room temperature so it may require melting for some uses.

All four of these oils are amazing! If you haven’t yet tried them out, you simply have to do so. You can purchase them all at your local pharmacy or health food store.

Seven amazing beauty tricks with coconut oil

Let’s work backwards. When you think of the benefits of coconut oil, I’m guessing that the last thing that comes to mind is rubbing the edible plant grease all over your face and body. Or your hair. But a growing body of research, countless experts and an army of natural beauty devotees like myself swear by the stuff for just about everything. Are we onto something? Uh, yes!


Tons of natural beauty products contain coconut oil, and for good reason: It’s naturally antibacterial and antifungal, it’s a brilliant moisturiser, it can penetrate your hair, and it leaves you smelling like a pina colada. Seriously – is there anything more luscious? I can’t think of anything. But what I can think of, are seven amazing uses for it in your very own home that don’t require spending a fortune on store-bought products.


In fact, all you need is one thing: Raw (and preferably organic) virgin coconut oil!

large


Seven ways to incorporate coconut oil into your natural beauty routine

#1: Use it to soothe dry hands

This won’t work for dry digits when you’re on the move, but at home, coconut oil works wonders on your dishwashing-parched palms. Keep a jar by your kitchen sink and apply a little to your hands after you wash your hands or dishes to keep them soft and moist.

#2: Use it to highlight your cheekbones

Nothing perks up a tired face like a little highlighter, right? You don’t need store-bought products to achieve this effect – simply sweep a little coconut oil on top of your make-up and leave it alone. It’ll make your skin look glowier, which is why many natural make-up brands use it as an ingredient in their formulas.

#3: Use it to shave your legs

Conventional shaving cream is nothing but a pricy cocktail of chemical that you don’t need for a nice, clean shave on your legs and under your arms. Coconut oil, on the other hand, is super-cheap, naturally antimicrobial, and smells heavenly! Plus, its skin-soothing properties will leave your skin looking hydrated (but never greasy).

#4: Use it as a deep conditioner

There are many reasons conditioners contain coconut oil. For one, it’s better able to penetrate hair and prevent protein loss than mineral oil. Use it in your hair and on your skin for deep conditioning. Just a small dollop is enough to moisturise a large area. It’s very effective at hydrating a dry or flaky scalp, too.

#5: Use it as a body moisturiser

When you apply coconut oil to your skin, it can help speed up wound healing. It’s also great for increasing hydration and reducing water loss in very dry skin. Sounds like a recipe for a great lotion to me!

#6: Use it to cleanse your face

Thanks to coconut oil’s antibacterial, antifungal and moisturising properties, it makes for a great facial cleanser. Simply rub the oil in circular motions all over your face, neck and chest, then wash off the residue with warm water.

#7: Use it as a massage oil

Many store-bought massage oils actually contain a natural oil like jojoba or coconut as their base. Cut out the middleman and go straight to the bottle, baby! It’s slippery, skin-friendly and oh-so-moisturising, too!

Share your coconut oil beauty hacks with me in the comments below!

Here’s why using vanilla on your skin and in your hair is pretty sweet!

No one ever wants to be referred to as “vanilla”, as in lacking unique qualities or any interesting traits. To be honest, though, I’ve never hated the term. I absolutely love the scent of pure vanilla! And, well, using vanilla for anti-ageing treatments and healthy hair has kind of always been my jam. The results have been anything but disappointing.


Vanilla does far more than just add a pleasant scent to natural soaps and hair conditioners. Incorporating this natural ingredient into your beauty routine will provide your body with a haven of nutrients, and an aroma that’s considered a natural aphrodisiac! Let me tell you more.

Dandelion-Template.jpg-vanilla


This is what made me test the benefits of vanilla in my beauty routine

I’ll admit that I’ve also been guilty of writing off pure vanilla extract as “just a nice way to add fragrance”. That was up until I got pretty tired of my hair smelling like sage. Weird, right? I always use to rinse my hair with sage.

Then, finally, I decided to do a little digging to see if incorporating vanilla into my natural hair routine could do a little more than tingle my senses. Turns out, it sure can! And, the benefits go far beyond shiny, healthy hair.

Vanilla comes in two forms and, while the flavour is exactly what is sounds, the natural oil extracted from vanilla beans is going to add shine and promote a healthy environment for skin health and hair growth by eliminating toxins that build up in our everyday life. Does it still sound plain and boring to you? Thought not!

A few of the many reasons I now can’t go without vanilla in my skin and hair home remedies

One of my favourite things in natural beauty is antioxidants. Pure vanilla extract contains specific antioxidants that are vital in anti-ageing and hair growth benefits. According to research these antioxidants can heal damaged skin, fade fine lines, soothe wrinkles, stimulate hair growth, and replenish damaged or dry hair.

In addition, a number of studies have found that pure vanilla extract has substantial anti-inflammatory properties. So, when you use vanilla on your skin, these properties help fight acne and breakouts. But the anti-inflammatory benefits aren’t limited to your face only – your scalp loves them too! With all those B vitamins and vanilla’s natural ability to fight off free radical, you can be sure it’s going to make for some super delicious skin and hair treatments.

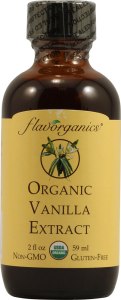
To reap these incredible benefits, you must of course purchase the right kind of vanilla, because most vanilla flavourings are just imitation and therefore don’t contain any of real vanilla’s benefits. Vanilla flavouring may be appealing due to its cheap cost, but save that for a treat for your tummy instead of a treat for your skin and hair. I’m now going to share two of my favourite vanilla home remedies with you.

Flavorganics-Organic-Vanilla-Extract-651170001009

Two vanilla home remedies to incorporate into your natural beauty routine

Now that I’ve convinced you to try out pure vanilla extract in your skin and hair routines, I’m going to share two of my favourite vanilla home remedies with you that are sure to get you started!

#1: Vanilla and macadamia nut face scrub

Exfoliating your skin is a great way to make way for new skin cells. Did I mention that vanilla can also help regenerate skin cells? Yup, that’s right. This is the ultimate treat for your face!

Ingredients:

  • 1 cup ground coffee
  • 2 tbsp organic raw honey
  • 1/4 cup macadamia nut oil
  • 12 drops lemon essential oil
  • 20 drops pure vanilla extract

Method:

  1. Place all the ingredients in a blender and blend until smooth.
  2. Decant the mixture into a small bowl.
  3. Apply the mixture all over your face and neck (and body if desired). Massage it into your skin in gentle circular motions. Leave it on for five minutes, then rinse your skin with warm water.

The result? Fresh, smooth skin that smells good enough to eat!

#2: Vanilla and coconut milk hair shine mask

This treatment will work well for all hair types. It’ll leave your locks feeling and looking silky smooth, and your scalp comfortably hydrated.

Ingredients:

  • 1 cup fresh coconut milk
  • 20 drops pure vanilla extract

Method:

  1. Mix up the ingredients in a small bowl.
  2. Apply the mixture to clean, soaking wet hair and leave on for 15 to 20 minutes. Massage the mixture into your scalp if you suffer from a dry or itchy scalp.
  3. Rinse your hair with cool water, and apply a natural leave-in conditioner to seal in all the moisture if desired.

Apply this natural shine mask to your hair once a week for best results.

Get rid of frizzy hair in an instant with this all-natural rosemary hair rescue mask

You know those days when the only option you have for your hair is putting it up in a bun or hiding it under a cap? When your hair is frizzy and out of control, it’s a sign that it’s unhealthy. So, luckily for this 911 hair rescue recipe!

large (12)


Tame unruly hair with this simple natural remedy

Ingredients:

  • 1/2 cup plain yoghurt (this will give your mask a strong base and help condition your hair)
  • 1 rosemary sprig (to stimulate hair growth)
  • 2 tbsp virgin organic olive oil
  • 1 tsp vitamin E oil
  • 3-4 drops peppermint oil

Method:

  1. Place all the ingredients in a blender and blend until smooth.
  2. Shampoo your hair as per usual with your regular shampoo.
  3. Add the mixture to your hair before rinsing your shampoo.
  4. Give your scalp a massage and leave the mixture on for 15 to 20 minutes.
  5. Rinse the mixture from your hair, then rewash your locks.
  6. Rinse your hair thoroughly. Finish off with a gentle blow dry on a warm (not hot) heat.

This is a fantastic stimulating and conditioning mask for those days where your hair just feels… Blah.

Try it out and let me know what you think of it in the comments below.

Detangle your curly hair naturally with marshmallow root

Do you have curly or wavy hair? Then I’m sure you’re all too familiar with those days when no detangling tool can make it through your hair.


After lots of tugging and pulling, you may want to give up – but have no fear! Simply take a deep breath, relax and grab dried marshmallow root and a few other simple ingredients!


This homemade detangler will help you save a buck or two, and also untangle and make your hair more manageable in an instant! Here’s the recipe…

large (9)


The detangling abilities of marshmallow root

Marshmallow root is pretty well-known for its detangling abilities because of its mucinogenic properties, which help soften hair naturally and give good slip. The prep work for this detangler is a little bit complex, but it’s still super easy to make. Let’s get started…

Marshmallow root hair detangler recipe

You’ll need:

  • 1 1/4 cup distilled water
  • 1/4 cup dried marshmallow root
  • 1 tbsp apple cider vinegar
  • 1/2 tbsp olive or jojoba oil
  • 10 drops grapefruit seed extract (or any other essential oil)

To make and use it:

  1. Place the marshmallow root in a pot with the water and heat it for 15 to 30 minutes on low heat until it thickens and forms into a gel. The longer it heats, the thicker it’ll be. Stir the mixture throughout to ensure you have an even consistency.
  2. When your mixture is as thick as you’d like it to be, turn off the heat and allow it to cool.
  3. To strain the mixture, place one knee high pantyhose over a cup and pour the mixture over the pantyhose. Remove the pantyhose from the cup and squeeze it in a downward motion to strain the gel and separate it from the dried marshmallow root.
  4. Add the apple cider vinegar, olive or jojoba oil and essential oil.
  5. Use the gel as it is for a natural detangling agent. Or, pour it into a spray bottle and add water until it thins out enough to spray. Shake well before each use.

Please note that this mixture needs to be stored in the fridge. It’ll last for around two weeks.